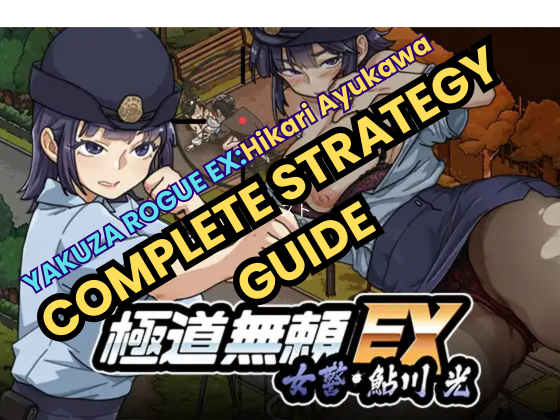
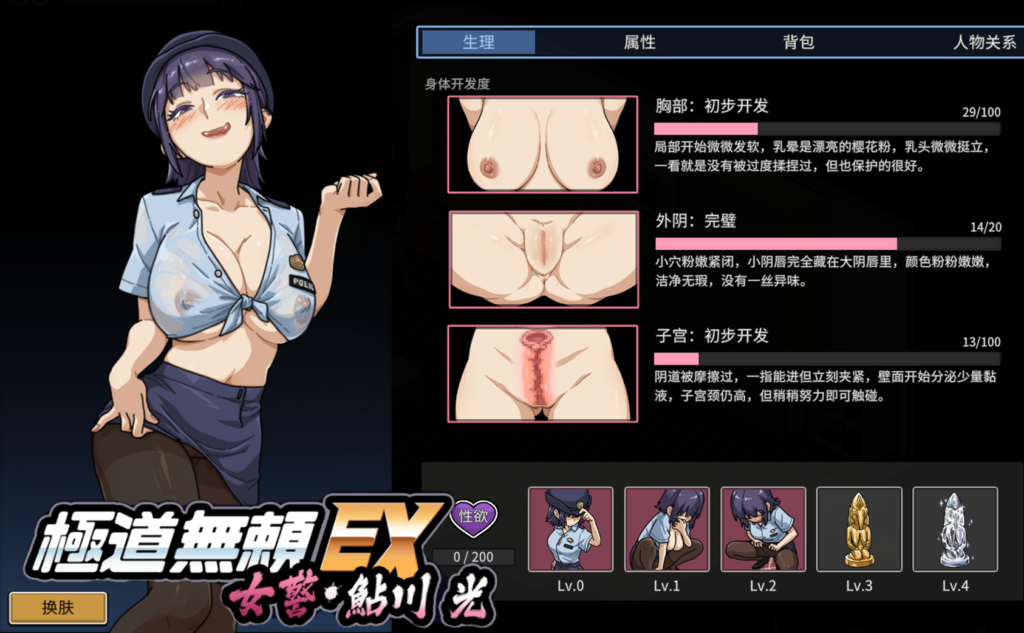
Welcome to the ultimate strategy guide and review for Yakuza Rogue EX: Hikari Ayukawa (極道無頼EX:女警・鮎川光), a dark corruption masterpiece developed by the brilliant circle WAKUWAKU!
⚠️ SPOILER WARNING:
This comprehensive guide contains full walkthrough charts, unlock conditions for all H-scenes, efficient money-making methods, and exact requirements for every ending branch. Read ahead at your own discretion!
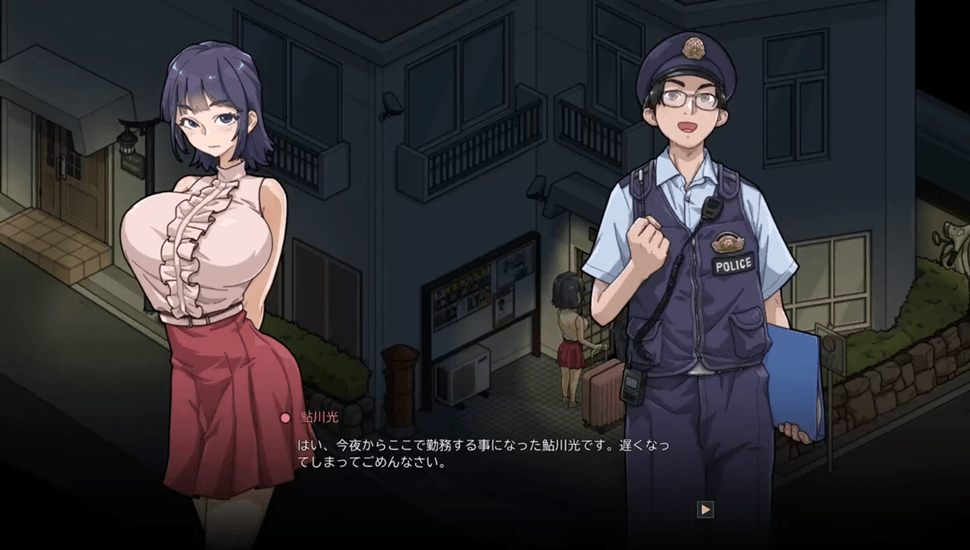
Ever since she was a little girl, Hikari Ayukawa had only one dream: to become a righteous police officer. That dream finally takes its first real step when she gets assigned to the Kuraku District Police Box.
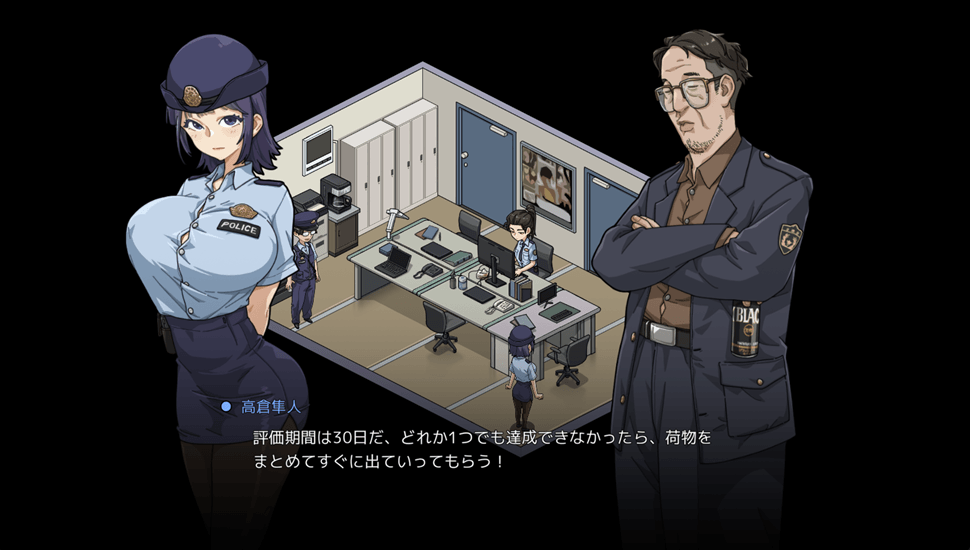
However, the reality awaiting her is far from ideal. According to her new supervisor, the precinct is critically understaffed—with only four officers, including Hikari herself. To make matters worse, local yakuza gangs have been rapidly expanding their influence, turning the district into a dangerous hotbed of crime and lawlessness.
In this brutal district, survival and promotion come down to a strict, merit-based accountability system. To prove she has what it takes to become a fully-fledged officer, Hikari must boost her job performance and restore peace to the streets within a strict 30-day trial period.
Determined to protect her lifelong dream, Hikari heads out onto the dangerous streets for her first patrol. Little does she know, the fine line between law enforcement and total corruption is about to blur…
🚨 1. Street Patrols & High-Stakes Tactical Combat
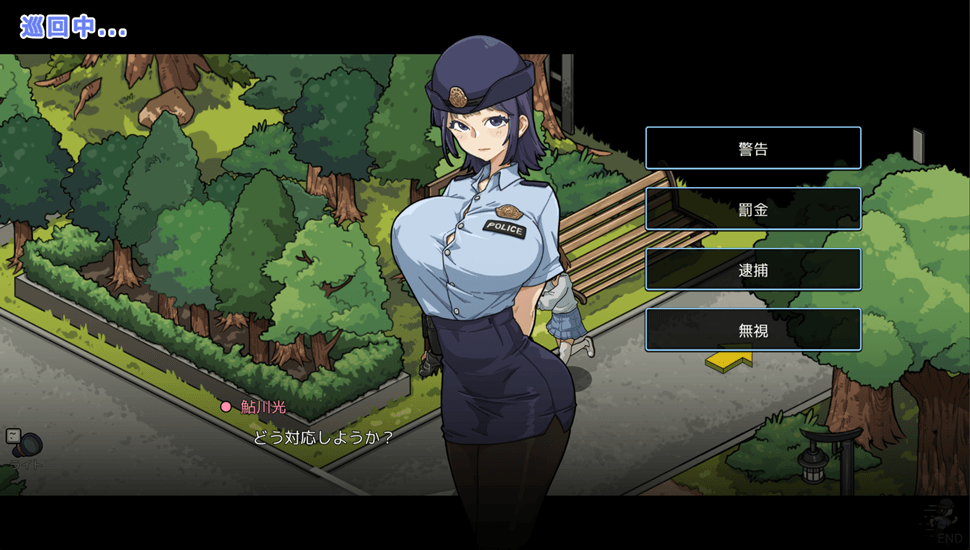
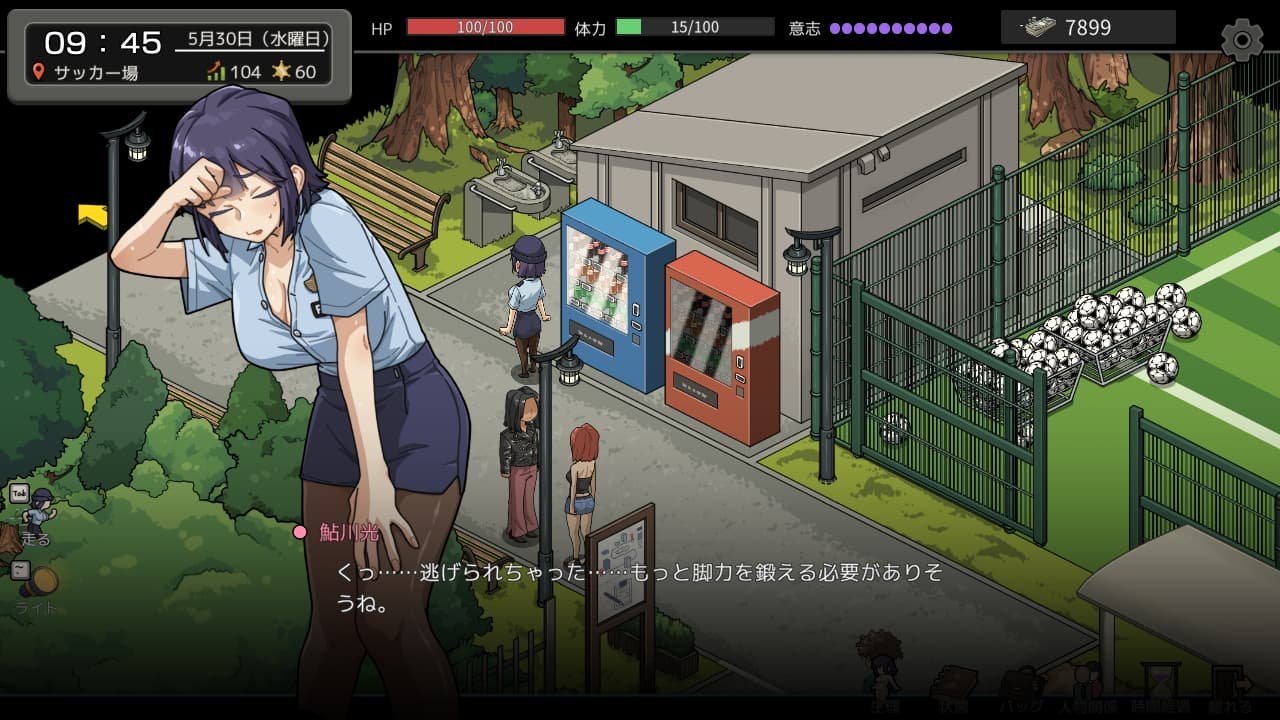
To secure her dream job, Hikari must boost her official evaluation score by maintaining peace in the district. Heading out to the local park lets you initiate street patrols, where you will regularly encounter suspicious individuals and neighborhood disputes. Choosing the right dialogue or action and reporting back to the precinct rewards you with higher safety ratings, better evaluations, and cash.
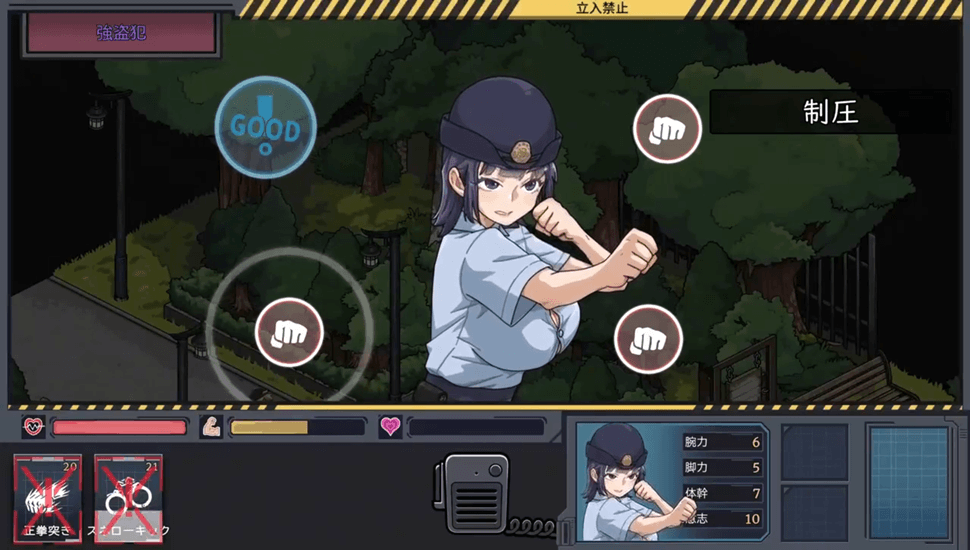
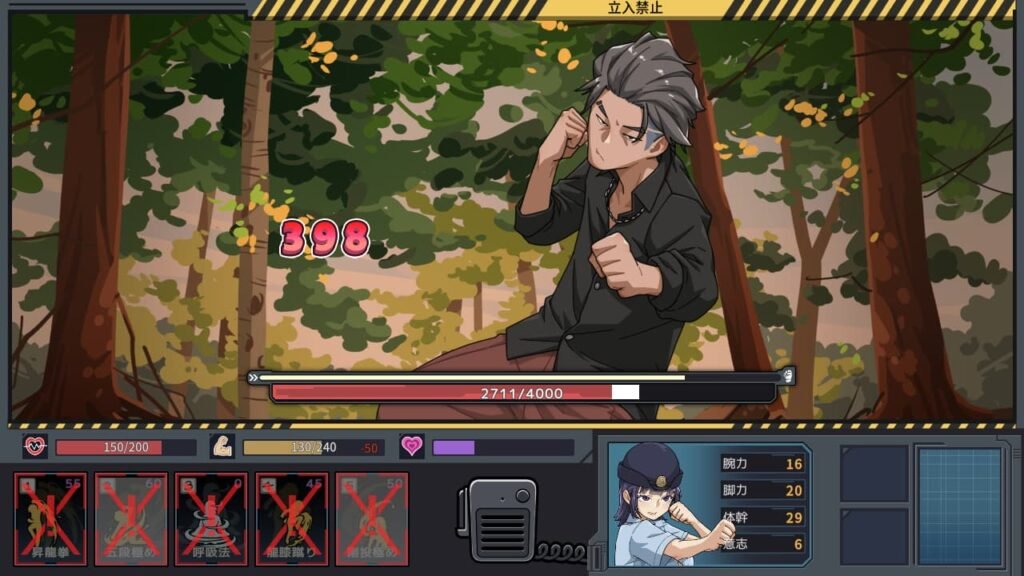
However, some thugs will snap and attack you on the spot, triggering a transition into an active battle. The combat utilizes an intense Active Time Battle (ATB) system. While dealing damage through the attack command, you must keep a sharp eye on the enemy’s action gauge. A perfectly timed button press allows you to completely parry and dodge incoming attacks!
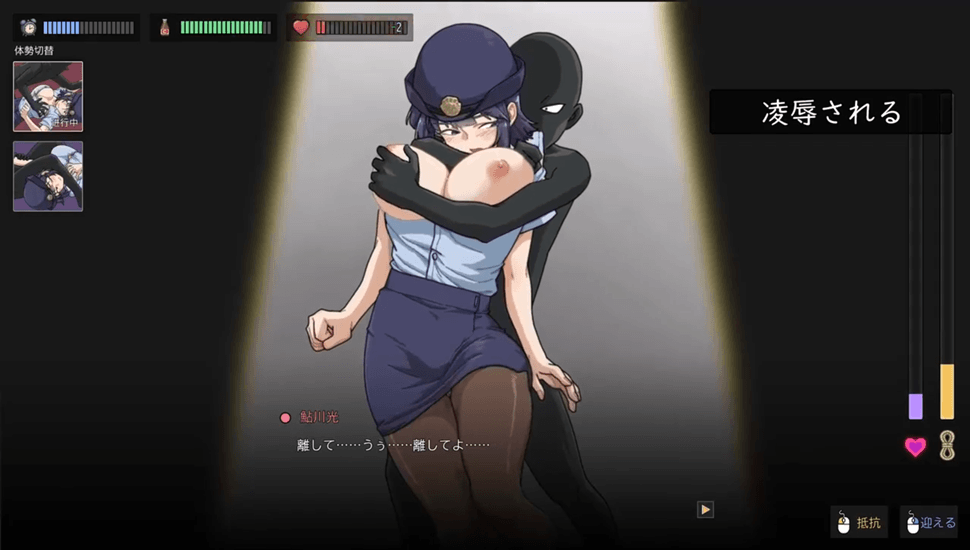
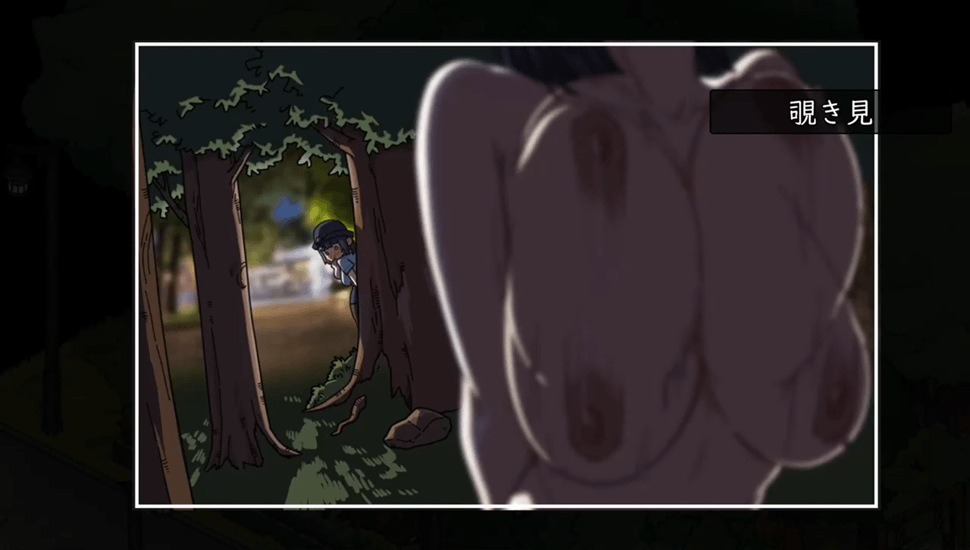
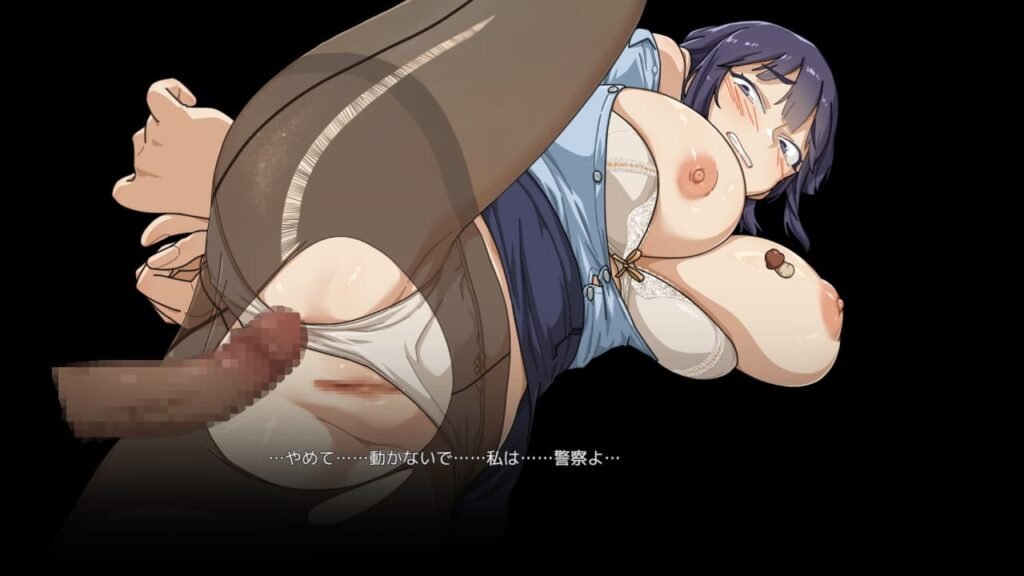
Fail to dodge, and the enemy will drag Hikari into a dynamic lewd assault. You can break free by holding down the left click to resist, but you’ll take continuous damage in the process. If your HP hits zero, it’s game over, triggering a unique defeat H-scene. As Hikari’s corruption level rises and her lust awakens, you’ll even unlock new behaviors—like voyeuring on couples outdoor-dogging and masturbating in public.
🎣 2. Open-World Freedom & Lewd Side Hustles
Outside of active duty, the game gives you incredible sandbox freedom to explore various districts. For instance, you can visit the Valley to chop wood or dive into a surprisingly well-crafted fishing mini-game to earn extra income. This hard-earned cash can be spent at the shopping district convenience store for special items, or at the local martial arts club to permanently train and upgrade Hikari’s base stats.
While patrolling the city, you can bond with specific NPCs by giving them gifts or solving their problems, which unlocks rare equipment and secret H-events. The corruption paths are deliciously varied—you can use your feminine charms to seduce a married man into a scandalous affair, or offer your body to the Chief of Police as a “casting couch” favor when your performance metrics are slipping.
⭐ 3. Final Verdict: A Must-Play for Tactical Corruption Fans
Circle WAKUWAKU delivers a fantastic experience starring the voluptuous rookie cop Hikari. While the difficulty curve is notoriously steep at the beginning, the game becomes incredibly rewarding once you figure out efficient money-grinding routes and stat optimization. The tutorial can feel a bit brief on specific mechanics, but using this strategy guide will ensure a perfectly smooth and comfortable playthrough!
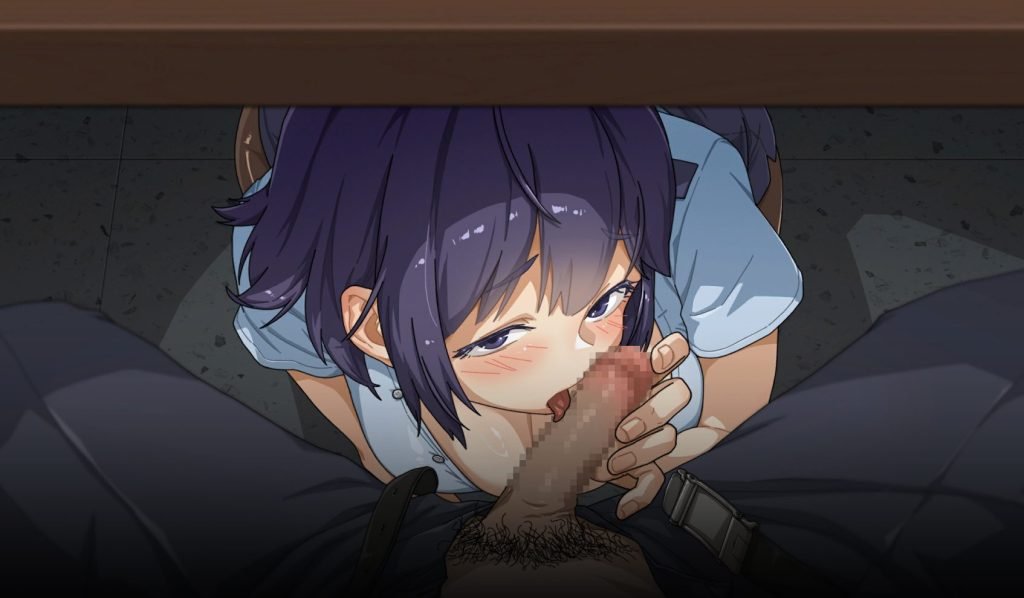
The progression of the adult content is masterfully designed. You start with standard non-consensual defeat scenes, but as Hikari’s corruption level peaks, she actively turns into the aggressor, initiating bold seductions herself. Plus, the inclusion of dedicated H-scenes for the various sub-heroines adds a wonderful layer of variety. If you love female-protagonist RPGs with actual gameplay depth, this is an absolute must-buy!
❓ FAQ
Q. Is there an instant unlock feature for all H-scenes?
A. Since the game doesn’t feature a traditional “Gallery/Recollection Room,” there is no instant 100% unlock function available. You’ll need to experience and unlock each scene naturally during your active playthrough.
Q. Exploring and patrolling feels too slow. Can I speed it up?
A. Yes! For general movement, simply hit the Tab key after completing the prologue tutorial to start sprinting. As for the street patrols, once you perform them a few times, a 3x Speed option will unlock, making your grinding routes much faster.
Q. The mini-games are brutally difficult! How do I beat them?
A. The difficulty of mini-games scales directly with Hikari’s base stats. If you’re struggling with the Martial Arts Club training, don’t force it—grind at lower levels to boost your stats first, and you’ll find it surprisingly easy when you return.
Additionally, completing specific NPC side quests will reward you with rare items that drastically ease the difficulty of these mini-games. Securing those items early is a massive game-changer!
🎮 Complete Strategy Guide & Walkthrough
🛡️ Core Mechanics
To survive your 30-day trial, you need to know the rules of the street. Patrols are your primary way to earn cash and boost your evaluation, but executing them blindly will get you penalized. Keep these crucial points in mind:
Watch the Clock: You cannot conduct patrols late at night when the streets are completely empty. Plan your schedule wisely!
The Penalty of Failure: If you choose the wrong disciplinary action when dealing with a suspect, your official evaluation score will drop when you report back to the police box.
Unlock New Maps: When you aren’t actively patrolling, interacting with the area-transition arrows (West or North sides of the Park) will trigger optional combat encounters. Winning these tough battles is the key to unlocking brand-new maps on your grid!
📋 Incident Response Cheat Sheet
When you catch someone breaking the law, you must enforce the correct tier of justice. Refer to this quick guide to avoid score penalties:
Incident / Crime Type
Correct Action
🚬 Smoking Violations
Warning (警告)
🔊 Noise Complaints (Arguments)
Warning (警告)
🍻 Public Drunk & Littering
Fine (Arrest if they refuse to pay)
🔨 Vandalism (Property Damage)
Fine (Arrest if they refuse to pay)
👊 Fist Fighting / Brawling
Arrest (逮捕)
🤬 Blackmail / Intimidation
Arrest (逮捕)
🔞 Indecent Exposure / Lewd Acts
Arrest (逮捕)
💰 Mugging / Robbery
Arrest (逮捕)
⚔️ Armed Brawl (Weapons)
Arrest (逮捕)
Break the Limit
Unlocking Hikari’s true desires is the core of her corruption journey. Raising her Lust Level requires different tactics depending on how corrupted she already is:
Lust Levels 1 to 3: Easily grind your way up by intentionally losing combat encounters (Defeat H) or engaging in public masturbation while voyeuring on outdoor couples.
Lust Level 3 and Beyond: Transition into an active seductress! From this point forward, you must use her body to actively seduce NPCs. Each time she reaches a climax during a seduction H-scene, you will be rewarded with +40 Lust EXP.
💡 Pro-Grinding Tip: There is absolutely no limit to how much EXP you can gain in a single session. If you play your cards right, you can theoretically farm infinite EXP from a single seduction! During these scenes, pay close attention to Hikari’s speech bubble on the right side of the screen. Matching your actions to her requested intensity level will drastically accelerate her pleasure gauge!
Advanced Combat Strategy & Survival Guide
Fights in this game can get incredibly punishing if you go in swinging blindly. Master these fundamental mechanics to turn the tide of battle:
Manage Your Cooldowns: You execute attacks by selecting commands from the bottom-left corner of the interface. However, once a command is used, it will be locked out under a cooldown timer. Plan your rotation carefully so you aren’t left defenseless!
Ditch the Mouse for Dodging: When an enemy unleashes an attack, timing your dodge is critical. While you can click with the mouse, using the SPACE BAR is infinitely faster, more responsive, and easier to consistently pull off perfect parries.
Hit a Brick Wall? Power Up! If the local thugs are completely wiping the floor with you, stop throwing yourself into a losing battle. Take some time to grind money, hit the Martial Arts Club to permanently upgrade Hikari’s stats, and stop by the Convenience Store in the shopping district to buy better equipment. A fully geared Hikari makes early-game roadblocks a breeze!
How to Dominate the Battlefield
As you push deeper into the city maps, the enemies scale drastically in power. If you try to rush through blindly, you will get crushed. Follow this optimal progression route to build an unstoppable build:
The Early-Game Priority: Your first major goal should be reaching the East Rest Area (東休憩所). This location dramatically boosts your money-making efficiency. Grind cash along the way, and pump those funds straight into the Martial Arts Club to steadily train Hikari’s base stats.
The Sweet Spot (Stat 15): Aim to get every single stat up to 15. Reaching this milestone unlocks incredibly high-damage skills. Once you equip these heavy-hitting abilities, standard thugs won’t stand a chance, and only the elite Most Wanted criminals will pose a threat.
Don’t Overlook Home Workouts: Stop by the shopping district convenience store and invest in stat-boosting room decorations like the “Rug” (カーペット) and the “Treadmill” (ランニングマシン). These passive stat gains are essential for optimization!
Hunt Down the Most Wanted: Defeating high-value “Most Wanted” criminals rewards you with top-tier equipment and rare items that permanently increase your stats. Once you feel confident in your combat rotation, actively hunt them down to rapidly snowball Hikari’s power!
🎮 Mini-Games Guide
Aside from active patrols, mastering the various mini-games around the city is essential for funding your gear and boosting Hikari’s combat performance. Here is the complete breakdown of how each mini-game works and how to beat them efficiently.
🪓 Woodchopping & Martial Arts Core Training (体幹強化)
You can initiate this mini-game by traveling to the Roaring Thunder Valley (雷鳴渓流) and speaking with Reiko, which consumes 35 Stamina per attempt.
The Mechanic: A shifting gauge will appear. Your goal is to time your inputs perfectly and stop the marker inside the central red zone to chop wood with maximum efficiency.
The Rewards: The more wood you successfully chop, the more cash you earn and the higher Reiko’s affection grows.
Stat Gains: This mini-game directly trains Hikari’s Core (体幹) stat. Note that the Core Training regimen available at the Martial Arts Club utilizes this exact same gameplay mechanic!
🎣 Fishing Mini-Game
To unlock fishing, head to the shopping district convenience store and purchase a Fishing Rod. Once equipped, you can fish at the docks in Roaring Thunder Valley.
How to Play: Keep a close eye on the water’s surface. The float will bob up and down anywhere from 1 to 6 times before fully submerging. The exact moment the float completely sinks under the water, Left-Click to reel in your catch!
💪 Martial Arts Club: Arm Strength Training (腕力強化)
This is a pure button-mashing endurance challenge where you must rapidly click the Left Mouse Button or mash the Left Arrow Key.
You farm Arm Strength EXP steadily as long as you maintain a perfect deadlock against the meter. However, be highly aware that the longer the timer ticks, the faster and more intense your mashing speed must be to prevent getting overwhelmed.
🏃 Martial Arts Club: Leg Strength Training (脚力強化)
An obstacle course mini-game where you accelerate Hikari by rhythmically alternating between Left-Click/Right-Click or alternating the Left/Right Arrow Keys on your keyboard.
💡 Pro-Tip on Pacing: If you accelerate to maximum speed, your reaction window to recognize upcoming obstacles becomes incredibly short. Unless you are already sitting at an exceptionally high training level, it is highly recommended to cap your running speed at a moderate pace so you don’t crash into hazards blindly!
Memorize these quick key-bindings to cleanly bypass every obstacle type on the track:
🚧 Hurdles: Press the Q key to perform a standard Jump.
🪵 Wooden Planks / Barricades: Press the W key to execute a heavy Tackle.
🕳️ High Hazards (Gap underneath): Press the E key to perform a low Slide.
💰 The Infinite Fishing Exploit
While sleeping restores your stamina, the game imposes absolutely no penalties for running an all-nighter. Therefore, the absolute best strategy for the early game is to hoard “Energy Drinks” (栄養ドリンク) from the convenience store and go on a fishing marathon.
🔄 The Infinite Loop Exploit:
You cannot chug Energy Drinks back-to-back. However, if you catch exactly 3 fish and then manually close the fishing mini-game, the cooldown resets, allowing you to drink another one instantly! Because the profit from selling 3 fish easily outpaces the cost of a single Energy Drink, you can abuse this method to fish infinitely without ever running out of stamina or cash.
🛒 Recommended Purchase Order
Spend your initial fishing profits wisely to snowball your efficiency:
Upgrade your Fishing Rod: Maximize your catch rate first.
Buy the “Sea Fishing Rod” (海釣りロッド): Once you have this, save up for the “Microwave” (電子レンジ) immediately as your top priority.
💡 Hidden Mechanic: The Microwave’s item description claims it only boosts the effects of food, but it actually amplifies the effects of drinks as well! Once you have these essentials secured, you can freely spend your surplus cash on combat gear or training at the Martial Arts Club.
📍 Location Tip: The river is split into Upstream and Downstream areas. Unless you are specifically hunting for the ultra-rare “Red-Eyed Golden Dragon” (紅眼金龍), the catch rates and profits between the two spots are almost identical, so fish wherever you like.
🎯 Tactical Fishing Tips
Larger fish shadows generally yield much higher selling prices. However, big fish swim incredibly fast—if you try to manually predict their path and cast your line directly in front of them, you’ll usually be too late.
Instead of obsessing over giant shadows, cast your line as far outward as possible and patiently wait. If a tiny, low-value shadow starts heading toward your bait, quickly pull your line back in to reset.
⚠️ Note: If a fish shadow flashes Red, it means it’s locked onto your bait and you can no longer pull the rod back safely. Just catch it! Failing or letting a fish escape still drains 10 Stamina anyway, so reeling it in is always the better option.
📈 Double Your Money: 2x Fish Selling Price
Want to maximize your grinding? Make sure to prioritize completing Shizue Kubota’s (久保田静江) special events.
Once you clear her questline, you unlock the ability to sell all your caught fish directly to Rei at double the standard market value (2x Price). The combat checks required for her event can be quite challenging during the early days, but the economic payoff makes it an absolute must-do as early as humanly possible!
🎁 Treasure Chests Guide
While exploring the city and surrounding areas, you will encounter wooden box objects scattered across various maps. Interacting with these boxes rewards you with a randomized pool of items.
🔄 How to Exploit the RNG (Save-Scumming):
All treasure chests respawn daily after 1 in-game day passes. More importantly, the loot inside is completely randomized the moment you open them. This means you can save your game right next to a chest and keep loading your save (Save-Scumming) until you roll the absolute best rewards!
The best spots to focus your grinding efforts include:
Roaring Thunder Valley (雷鳴渓流): Highly recommended for RNG farming. This chest drops the ultra-rare “Red-Eyed Golden Dragon” (紅眼金龍), which can be sold for massive profits, making it worth every single reload.
Deep Forest 1 (密林1) & East Rest Area (東休憩所): Both locations feature a chest that drops a whopping 20,000 Gold at a low drop rate. ⚠️ Danger Warning: Be extremely careful when going for the Deep Forest 1 chest (located northwest), as the dangerous criminal Takeshi Akamatsu (赤松剛志) patrols this area!
📍 Treasure Chest Locations Map
Refer to this list to track down every single chest available in the game. (Note: You can reference your gameplay images for the exact visual spots!)
Map Name
Exact Chest Location
Roaring Thunder Valley Center
Hidden near the central area surrounded by dense trees.
Soccer Field
Tucked away in the southeastern corner of the field.
East Rest Area
Right inside the main rest station area.
Deep Forest 1
Located on the northern side of the woods.
Deep Forest 2 (West)
Hidden on the far western side of the map grid.
Deep Forest 2 (Northeast)
Located deep in the northeastern clearing.
👥 NPC Character Events & Questlines Guide
Interacting with the citizens and key characters of the Kuraku District unlocks powerful passive perks, double shop prices, secret maps, and highly rewarding adult scenes.
🍄 Universal Gift Strategy:
While each NPC has their own specific favorite items, you can always gift them a “Mokori Mushroom” (モコーリキノコ) to boost their affection. These special mushrooms can be gathered by manually inspecting the small fungal growths found in outdoor public urination spots.
Mika Seto (瀬戸美香)
Unlock Route & Schedule:
Initial Trigger: Head near the bushes at the northeast corner of the Park Entrance around 20:00. This triggers her first H-event, which automatically forces Hikari’s Lust to Level 2 and permanently unlocks the public voyeurism/masturbation mechanic.
Daily Routine: From the next day onward, she will appear at the Park Entrance from 07:00 to 13:59. Talk to her here to build affection. Her absolute favorite gifts are Wine items.
Home Visits & Seduction:
Affection 50 Milestone: Reaching 50 Affection unlocks access to her private residence in the Residential Area. You can visit her at home between 14:00 and 19:00. Note that her home counts as a separate zone, meaning you can double-dip on gifts by giving her one in the park and another one at her house on the same day!
Midnight Infiltration: Sneak into her house at around 22:00 to witness a secret H-scene. Once Hikari’s Lust Level reaches 3, you can choose to actively engage in a full seduction H-scene with her.
Yumiko & Shigeru (由美子&茂)
Unlock Route & Schedule:
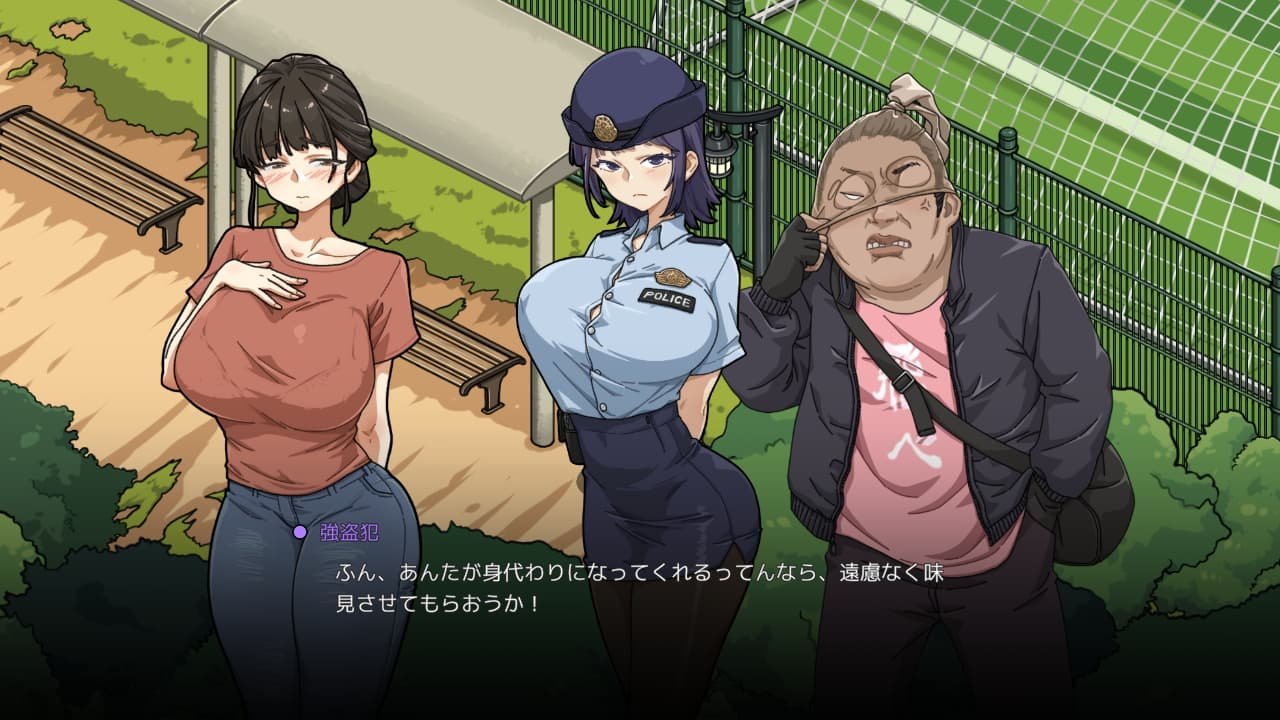
Initial Trigger: Head to the southeast corner of the Soccer Field at around 09:00. You will find a woman being harassed by thugs. Select “Help” (助ける) and win the combat encounter.
Next-Day Follow-up: Return to the exact same spot at 09:00 the next day and talk to Yumiko. She will reward you with a “Deluxe Shrimp Noodle” (豪華エビヌードル) and gain +20 Affection.
Daily Routine: She will regularly appear at the Soccer Field from 09:00 to 12:59 for gift-giving. Her favorite gifts are Gourmet Recipes. On certain random days, she may get cornered by thugs again, so stay sharp.
The Criminal Incident & Seduction Route:
Affection 60 Emergency Radio: Once her affection sits around 60, wander into the Park area around 18:00 to trigger a special dispatch radio informing you of an ongoing criminal incident at the Soccer Field.
The Trap: Rush to the southeast corner of the Soccer Field to trigger Yumiko’s crisis scene. Choose “Enforce the Law” (取り締まる) to initiate a brutal 2-stage back-to-back combat gauntlet. Intentionally losing this battle unlocks a unique defeat H-scene.
Unlocking the House: Emerging victorious from the 2-stage battle permanently unlocks their residential home. You can visit Yumiko from 13:00 to 17:00, and interact with her partner Shigeru from 17:00 onwards.
Seducing Shigeru: Pump Shigeru’s affection up to 50 so he willingly invites you deeper into the house during visits. Once Hikari hits Lust Level 4, choose the “Seduce” (色仕掛け) option to trigger his exclusive H-scene.
Shizue Kubota & Rei (久保田静江&玲)
Unlock Route & Schedule:
Initial Trigger: Speak to the elderly woman at the East Rest Area at around 09:00 to start a lost cat quest. Head to the West Rest Area, check the roof of the public restroom to find the calico cat, and successfully clear the Leg Strength training mini-game to retrieve it.
Completing the Quest: Visit Shizue’s house in the Residential Area any time after 08:00 to hand over the cat and permanently unlock her home functions.
Massive Economic Perks & Mystery Boxes:
Sanity Restoration: Speaking to Shizue and selecting “Psychological Consultation” (心理相談) allows you to instantly recover your heavily depleted Willpower stats.
The 2x Fishing Exploit: Speaking to Rei allows you to use the “Sell Fish” (魚売却) option. She buys all fish at 200% (Double) the standard price of the convenience store! Selling the legendary “Red-Eyed Golden Dragon” (紅眼金龍) to her is the single fastest way to skyrocket her affection.
Rei Affection 60 Gacha: Once Rei hits 60 affection, you can select the daily “Mysterious Treasure Chest” (神秘の宝箱) option. Available once per day, this chest features a vastly superior loot table compared to open-world chests, dropping premium gift items and massive lump sums of raw cash.
China Kosaka & Ayako (小坂千奈&綾子)
The 5-Day Stalker Investigation:
Initial Trigger: Visit the West Rest Area around 18:00 to find China, Ayako, and a male victim. Speak with them to initiate the investigation.
The 5-Day Grind: China will continue to spawn at this exact same spot and time every day. You must return and speak with her on 5 separate days to advance the plot. Along the way, you will be forced to select “Help” (助ける) and defeat attacking thugs.
The Midnight Restroom Ambush:
The Midnight Rendezvous: After the 5th conversation, arrange a sting operation with China inside the West Rest Area women’s restroom at 02:00 AM.
The Choice: Defeat the lookout enemy at the entrance. Inside the restroom, choose “Continue to Observe” (続けて観察) two times in a row. Once Hikari thinks to herself “That’s the sign! Should I move in?!”, instantly select “Step forward and stop them” (前に出て止める) and win the ensuing combat.
💰 Affection Milestone: Choosing to refuse the money reward after rescuing China grants a significantly higher boost to her max affection, unlocking her as an active combat assist summon!
Takeshi Akamatsu (赤松剛志)
This dangerous criminal actively patrols the **Deep Forest 1 (密林1)** map grid. Bumping into him immediately triggers a high-stakes combat encounter. You can defeat him up to three times for cascading rewards:
1st Victory Reward — “Golden Axe” (金の斧): The ultimate woodchopping utility. Carrying this item completely breaks the Woodchopping mini-game mechanics—no matter where you stop the gauge, it automatically registers as a perfect central red-zone hit! You can literally just mash the button blindly to rake in maximum profits instantly.
2nd Victory Reward — “Ancient God’s Blessing” (古神の祝福): A premium defensive accessory that flatly mitigates incoming damage by **-50 points** per hit, drastically boosting Hikari’s survivability in late-game brawls.
3rd Victory: Allows you to permanently secure and Arrest (逮捕) him to clear his bounty once and for all.
Yusuke Kawashima (川島佑介)
Unlock Route & Hunting Strategy:
The Conversation Trigger: Head to the northeastern clearing of **Deep Forest 2 (密林2)** at around 11:00 AM to witness an important conversation event between Yusuke and Morimura.
The Ambush: Return to that exact same northeastern spot at around 21:00 (9:00 PM). Speak directly with Yusuke and confidently select the “Arrest” (逮捕) option to initiate the boss fight.
The Legendary Drop — “War God’s Gloves” (闘神のグラブ): Emerging victorious rewards you with this powerful gear piece. Equipping it adds a massive flat **+80 Bonus Damage** to all of Hikari’s active combat attacks. Fun hidden perk: this gear remains active and can also be used during public voyeurism/masturbation sequences!
Kota Morimura (森村浩太)
After successfully tracking down and viewing the daytime conversation event between Yusuke and Morimura in Deep Forest 2, Morimura will begin spawning independently.
Daily Schedule: He will regularly appear at the **Roaring Thunder Valley (雷鳴渓流)** between 09:00 and 11:59 AM. His absolute favorite gifts are Erotic Magazines (エロ雑誌系).
Affection 75 Milestone — “Fishing God Rod” (釣神ロッド): Reaching 75 affection unlocks this legendary tier rod, allowing you to cast far out into the deep water to target the fast-moving elite fish shadows.
Affection 85 Milestone — Combat Summon: Reaching 85 affection permanently unlocks him as an active, heavy-hitting combat assist summon during battles.
The Betrayal / Arrest Route: Alternatively, you can choose to turn on him. Selecting the “Arrest” (逮捕) prompt triggers an aggressive boss battle. Defeating him rewards you with the “Training Dummy” (訓練用ダミー) item.
Seiya Fujimoto (藤本誠也)
Located right inside your home base at the **Police Box (交番内)**. His favorite gifts are items loaded with an **”Erotic Aura” (Hなオーラ)**.
🌟 The Ultimate Prize: Maxing his affection out to **100** and returning home late at night triggers a unique conversation event. He will gift you the legendary “Space-Time Nipple Piercing” (時空の乳首ピアス). Carrying this broken utility item allows you to instantly skip and auto-win the tedious Leg Strength obstacle training mini-game!
Ryoko Tanaka (田中涼子)
Another fellow officer found inside the **Police Box**. She heavily prefers **Cosmetic/Makeup** type gift items.
Maxing out her affection doesn’t unlock any unique passive equipment, but it permanently grants you the ability to call her in as an active combat assist summon to back you up during tough battles.
Hayato Takakura (高倉隼人)
After successfully capturing any of the Most Wanted bounties listed on your precinct laptop, walk around the **Police Station (警察署)** area to trigger a radio call from Takakura.
Answering his call rewards you with a flat **10,000 Gold**, a Certificate of Commendation, and a **+30 boost** to his affection. Each milestone certificate yields massive permanent stat buffs for Hikari:
🎖️ 1st Milestone — “Purple Certificate” (紫の表彰状): Grants permanent **Max HP +80 & Leg Strength +5**.
🎖️ 2nd Milestone — “Red Certificate” (赤の表彰状): Grants permanent **Max HP +80 & Core Stat +5**.
🎖️ 3rd Milestone — “Green Certificate” (緑の表彰状): Grants permanent **Max HP +80 & Arm Strength +5**.
Rika Ijuin (伊集院莉花)
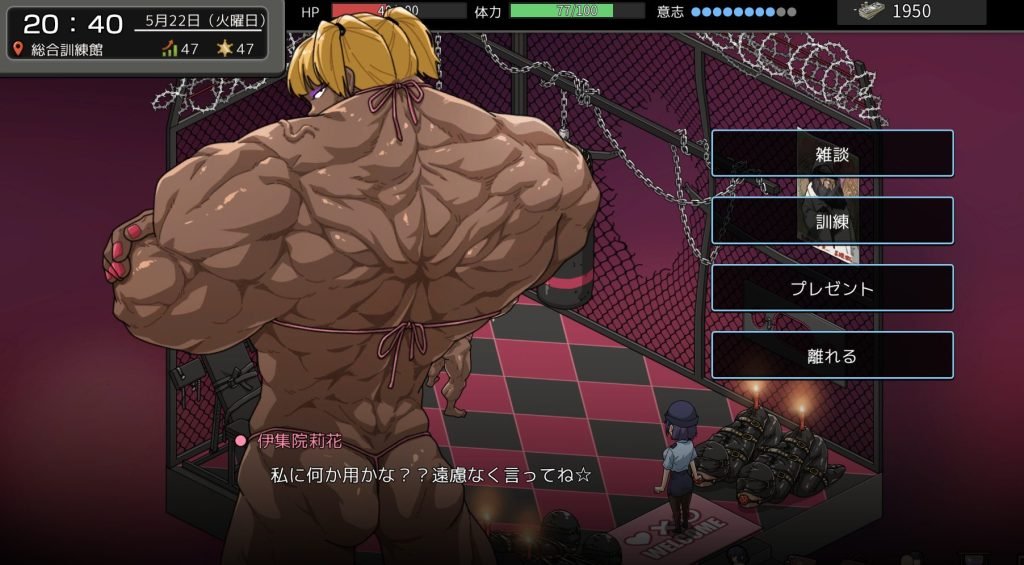
The elite instructor residing at the **Martial Arts Club (格闘技クラブ)**. She has highly specific tastes, preferring **Plushies, the Riryu-kai Roster, and Clues on the Shinri Cult**.
⚠️ Loot Warning: Her preferred items cannot be bought at standard convenience stores. Your only source for her gifts is relying on the low drop-rates from randomized world treasure chests, so make sure to save-scum your chest openings!
Reaching 100 Affection with Rika is completely worth the grind—she will officially pass down her legendary secret martial arts technique, **”Meikyo Shisui” (明鏡止水)**, directly to Hikari.
Reiko (麗子)
Found managing the wilderness at the **Roaring Thunder Valley (雷鳴渓流)**. Unlike standard NPCs, you cannot buy her love through conventional gifts—her affection can only be raised by continuously executing the Woodchopping labor mini-game.
*Note: Pushing her affection all the way to 100 serves purely as an efficiency marker for your woodchopping profits; it does not unlock any hidden story flags or secret H-scenes.*
🏁 Endings & New Game Plus (NG+) Guide
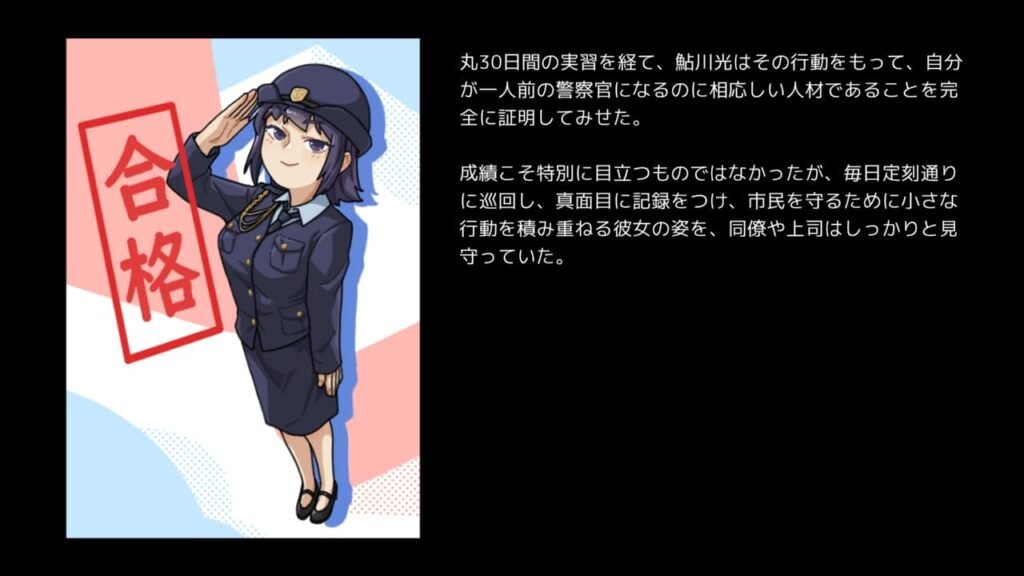
Once you successfully survive and navigate your way to Day 30, you will officially reach the campaign’s conclusion.
❓ Are there multiple ending branches?
Surprisingly, even if you let the district’s Safety Rating completely tank to 0, Hikari will still technically pass her evaluation and secure her official full-time employment as a permanent police officer. Because of this, it appears the game does not feature any major narrative ending splits or branching paths based on your performance.
New Game Plus (NG+) Mechanics:
After the credits roll, loading your completed clear-game save data allows you to initiate a 2nd playthrough (New Game Plus). This feature lets you carry over select character stats and unlocked progression elements from your previous run, making it significantly easier to sweep through early roadblocks and fully explore any remaining NPC paths or missing H-scenes!
🔞 H-Scene Unlock Conditions & Gallery Guide
Since the game lacks a traditional post-game recollection room, unlocking these scenes during your active 30-day playthrough is essential. Refer to this comprehensive cheat sheet to meet the exact requirements for every adult sequence.
H-Scene Title
Unlock Conditions
Chikan Defeat (痴漢敗北)
Lose a combat encounter against a Chikan (Groper).
Robber Defeat (強盗犯敗北)
Lose a combat encounter against a Robber.
Delinquent Defeat (不良少年敗北)
Lose a combat encounter against Thugs / Delinquent Boys.
Kidnapper Defeat (誘拐犯敗北)
Lose a combat encounter against a Kidnapper.
Beggar Defeat (物乞い敗北)
Lose a combat encounter against a Beggar.
Drunkard Defeat (酔っ払い敗北)
Lose a combat encounter against a Drunkard.
Peeping Masturbation (覗き見オナニー)
Reach Lust Level 1+. Interact with a lewd public scene to spy on them while masturbating.
Masturbation at Home (自宅でのオナニー)
Triggers at a random percentage chance when sleeping at home once Hikari hits a high enough Lust Level.
Outdoor Urination (野外放尿)
Reach Lust Level 2+. Interact with specific spots in the Park when Hikari’s bladder gauge is completely full.
Body Seduction (体で誘惑)
Reach Lust Level 3+. Select the “Seduce with Body” option during a standard confrontation with street suspects.
Takeshi Akamatsu Defeat (赤松剛志敗北)
Lose a combat encounter against the Most Wanted criminal Takeshi Akamatsu in Deep Forest 1.
Yusuke Kawashima Defeat (川島佑介敗北)
Lose a combat encounter against the Most Wanted criminal Yusuke Kawashima in Deep Forest 2.
Kota Morimura Defeat (森村浩太敗北)
Lose a combat encounter against Kota Morimura at Roaring Thunder Valley.
Seducing Morimura (森村浩太誘惑)
Reach Morimura Affection 50+ & Lust Level 3+. Speak directly with him at Roaring Thunder Valley to initiate the scene.
Mika Peeping (瀬戸美香H覗き)
Triggers naturally by progressing through Mika Seto’s introductory questline in the park bushes.
Mika Home Infiltration (瀬戸美香自宅H)
Infiltrate Mika’s private house around 22:00. If Hikari’s Lust Level is 3+, you can actively join in.
Yumiko Assaulted (由美子襲われ)
Triggers naturally as you progress through Yumiko’s initial storyline milestones.
Yumiko Gang Assault (由美子集団襲われ)
Triggers by advancing through Yumiko’s high-affection criminal dispatch radio event.
Yumiko Rescue Failure (由美子集団襲われ敗北)
Lose the intense 2-stage combat gauntlet during Yumiko’s gang assault event at the Soccer Field.
Seducing Shigeru 1 (茂とのH)
Reach Shigeru Affection 50+ & Lust Level 4+. Visit their home and choose the “Seduce” (色仕掛け) option.
Seducing Shigeru 2 (茂とのH2)
Reach a high affection rating with Shigeru and Lust Level 4+. Visit Yumiko’s house around 21:00, execute the “Chat” command twice in a row, then select “Seduce.”
China Restroom Sting (小坂千奈トイレH)
Progress through China’s stalker questline. If Hikari’s Lust Level is 3+, she will join the action.
Glory Hole Failure (壁尻H)
During China’s midnight restroom ambush sting, choose “Step forward and stop them” but lose the resulting combat encounter.
Active Prostitution (売春)
Must unlock and view the “Glory Hole Failure” scene first. Afterward, visit the West Rest Area around 18:00, speak with Ayako, and select “Prostitution.”
Casting Couch Favors (署長への性奉仕)
Let your metrics tank: drop below 20 Evaluation Points & below 5 Safety Rating. Answer the special radio call from the Chief of Police and choose “Sexual Favors” (性奉仕). *Requires a baseline Lust Level.*
Gym Equipment Play (格闘技クラブ器具オナニー)
Reach Lust Level 4 to unlock the MMA Gym Key stock. Purchase the key, head to the Martial Arts Club after 24:00 (Midnight), and inspect the training equipment.
📝 Thinking of Buying Yakuza Rogue EX?
Haven’t played the game yet? Check out our spoiler-free review, gameplay impressions, and the best official places to buy!
Hi there! Found a great manga but not sure how to buy it?
Don’t worry! DLsite is the safest place to get official Japanese manga, and I’ll show you how to navigate it like a pro!
✨ 100% English & Global Friendly:
Full English Interface:The entire platform can be navigated in English. Don’t forget to switch the language to English in the top-right corner of the site!
English Customer Support:If you ever run into any issues, DLsite provides official customer service in English, so you can shop with absolute peace of mind.
💡Pro Tips:
Switch Language: Don’t forget to switch the language to English in the top-right corner of the site!
Log in First:Make sure to Login or Create an account first! If you aren’t logged in, the charge pages might show an error.
🛒 My Recommendation for Smooth Shopping: If you want to use VISA, Mastercard, or Apple Pay, you cannot buy directly on the checkout page. My absolute recommendation is to purchase a Point Code here firstat the Official Global Point Shop and use it to shop! It’s the easiest and safest workaround for international fans.
DLsite also provides an official payment guide to help you out! Check it out here
Wait! Before you click, I have an important update for you! 📢
Many fans ask me, ‘Why can’t I use my VISA or Mastercard directly?’
The truth is, it’s not DLsite’s fault! Currently, international card brands (like VISA and Mastercard) have placed very strict global restrictions on adult-themed content and creative freedom in Japan. It’s a bit frustrating, right?
But don’t let that stop you from supporting your favorite artists! You can easily bypass this by using JCB or grabbing a Point Code through the official global shop.







コメント